How to Enhance a Blurry Image
Learn how AI can make a blurry image clearer, what it can fix, and the best workflow for natural-looking results.
A blurry image is one of the most common photo problems. Whether it is a slightly soft portrait, a shaky product shot, or an old print that has lost its edge, AI image enhancement can often recover more detail than you might expect. Here is how to get the best result.
What counts as "blurry"
Blur is not one thing. Before fixing it, it helps to know what kind you are dealing with:
Soft focus blur — the whole image looks slightly out of focus, like a lens was not quite locked. This is the easiest to fix. The details are still there, just not sharp.
Motion blur — caused by camera shake or a moving subject. One direction looks smeared. Fixable if the blur is not too heavy.
Compression blur — looks blocky or fuzzy, usually from saving a JPG too many times or at very low quality. The structure is there; it just needs cleaning up.
Heavy blur — the subject is barely recognizable. AI cannot invent new detail. It can only guess based on what is there. Results will be limited.
What an AI image enhancer can and cannot do
AI image enhancement uses machine learning to predict what sharper detail should look like. It works best when there is enough structure for the model to work with.
Can usually fix:
- slightly soft portraits and selfies
- photos with mild motion blur (slight camera shake)
- images that look dull or washed out
- photos affected by light compression artifacts
Usually cannot fix:
- subjects that are completely unrecognizable
- heavy motion blur that smears the whole frame
- screenshots of text that needs to be read accurately
- heavily filtered or over-compressed images
The rule: if you can still see the subject and its edges, AI has something to work with.
Step by step: how to enhance a blurry image
Step 1: Get the highest quality original
Do not screenshot another screenshot. If you have the original file, use that. A screenshot of a screenshot is already degraded, and each generation loses more detail.
Step 2: Upload to an AI image enhancer
Use the AI Image Enhancer on the ImgEnhancer homepage. Upload the blurry image directly — no need to crop or resize first.
Step 3: Compare at 100% zoom
After processing, check the result at actual pixel size (100% zoom), not the thumbnail preview. Zoom in on faces, eyes, hair edges, and text areas. This is where artifacts show up.
Step 4: Look for these specific problems
- Does the face still look like the same person?
- Are eyes and teeth natural, not glossy or warped?
- Did any text, logos, or labels change?
- Are edges too crispy or surrounded by a halo?
Step 5: Download if it looks right
If the enhanced result looks cleaner without looking fake, download and use it. If it looks wrong, try a different original image or accept that this particular photo may be too far gone.
Before and after
The portrait below shows what a mild blur looks like before and after AI enhancement. The facial features, eye clarity, and hair edges improve noticeably without looking processed.
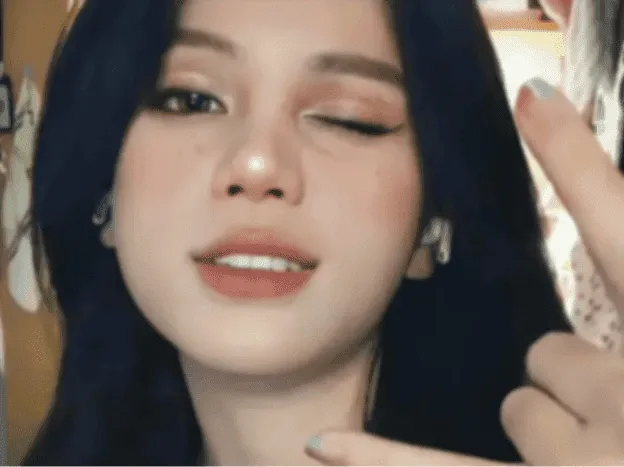
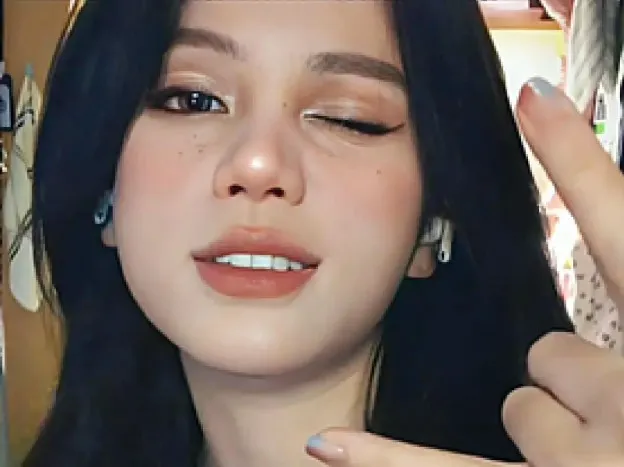
Notice the difference in eye clarity and facial texture. The enhanced version is not artificially sharp — it looks like a properly focused photo.
Tips for better results
Start with better sources. A photo taken in good light with a steady hand will enhance better than a heavily compressed social media screenshot.
Fix blur before upscaling. If the image is also too small, enhance it first at the original size, then use an AI Image Upscaler to enlarge the enhanced result. Upscaling a blurry image first just makes the blur bigger.
For portraits, keep faces large in the frame. Tiny faces in a wide shot are harder to enhance accurately. The larger the face in the original, the better the enhancement.
One pass is usually enough. Running the same image through multiple enhancement passes can introduce artifacts. Get it right in one pass if possible.
Common use cases
Blurry selfies and profile photos
Selfies taken in low light or with a phone's post-processing often look soft. AI enhancement can sharpen facial features, improve skin texture, and make eyes look more defined without looking plastic.
Product photos for ecommerce
A product shot taken without a tripod can look soft at the edges or slightly out of focus. Enhancement can fix this enough for web use without re-shooting.
Old family photos
Scanning an old print introduces blur and noise. AI enhancement can recover some of the original clarity, though heavily aged photos with faded detail will have limits.
Social media screenshots
Saving a JPG from a social platform and re-uploading it creates compression artifacts. Enhancement cleans up the blockiness and restores some sharpness.
Frequently asked questions
Can AI fix heavily blurred photos?
AI can improve mild to moderate blur. It cannot recover details that are completely missing. If the subject is barely visible, the result will be limited.
Does enhancing a blurry image reduce quality?
No — it creates a new enhanced version. Your original file stays unchanged. You can always go back to the original if the enhancement does not look right.
Can I enhance a screenshot of text?
AI enhancement is not designed for text accuracy. If you need readable text, the original photo needs to be clearer. Enhancement may change small characters in unexpected ways.
Should I enhance before or after upscaling?
Always enhance before upscaling. Fixing quality first means the upscaler works with cleaner data, producing better enlarged results.
What image formats work best?
JPG, PNG, and WebP all work. Use the highest quality original you have. The better the input, the better the output.
Bottom line
AI image enhancement works best on photos that are slightly soft but still recognizable. Get a good original, upload it, check the result at full zoom, and download if it looks natural. For images that are too far gone, no tool can recover what was never there in the first place.